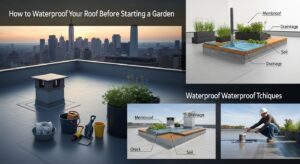
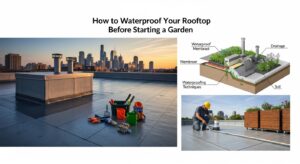
Rooftop gardening has become more popular in today’s urban areas full of concrete. People love how they look and help the environment. But before you start your rooftop garden, you must waterproof it first. If you skip this step, you could end up with damage to your building, leaks, and expensive repairs. This guide will show you how to waterproof your roof before you plant a garden.
1. The Need to Waterproof Rooftop Gardens
Rooftop gardens expose building surfaces to constant water contact from rain and irrigation. Without proper measures, water might leak into the structure, leading to mold growth, corrosion, and damage to the building’s structural integrity.
Expert Opinion:
Roofing and structural engineering experts agree that waterproofing is essential, not optional.
Waterproofing Advantages:
- Stops dampness and water loss
- Protects structural elements from decay
- Extends your building’s durability
- Reduces maintenance expenses in the long run
2. Essential Elements of Successful Waterproofing
Here are three basic principles to ensure effective waterproofing:
- Impermeability: Materials need to block water from getting through.
- Durability: Waterproofing must handle changes in temperature and use.
- Flexibility: Materials should bend with small shifts in the building.
Helpful Hint:
Pick a waterproofing system that fits your weather, roof size, and garden type (like pots or green roofs).
3. Getting to Know Your Roof’s Structure
Before you start waterproofing, take a good look at your roof:
- Does it have a slope or is it flat?
- What’s the roof made of? Metal, concrete, or asphalt?
- Can you see any cracks, leaks, or problems with water flow?
Ask an Expert:
Get a structural engineer or contractor to check your roof’s load-bearing ability and state.
4. Common Techniques to Waterproof
Various methods work for different building types and budgets:
- Liquid Waterproofing Membrane: Simple to apply, great for uneven surfaces
- Bituminous Coating: Affordable and tough
- EPDM Rubber Sheets: Resist UV and last long
- PVC Waterproofing Membranes: Common in big commercial setups
- Cement-based waterproofing: Standard for terraces and balconies.
Recommendation:
For most home rooftop gardens, liquid membrane or EPDM sheets strike a good balance between cost, ease of use, and how well they work.
5. Step-by-Step Waterproofing Process
Follow this thorough process to make your rooftop watertight:
Step 1: Clean the Surface
Get rid of trash, dirt, and grease. A power wash does the job best.
Step 2: Fix Damages
Use concrete sealant or filler to patch up holes and cracks.
Step 3: Put on the primer
Spread a primer to get the surface ready and help things stick better.
Step 4: Install the Waterproofing Layer
Lay down the waterproofing membrane you chose. For liquid membranes, use rollers or sprayers to spread them out.
Step 5: Protection and Curing Layer. Let it cure based on product guidelines.
Put on a protective layer such as geotextile or insulation boards.
Step 6: Drainage and Slope Setup
Make sure water can flow to drains, creating a slight slope if needed.
Step 7: Final Check
Do a water ponding test to look for leaks.
6. Picking the Best Waterproofing Material
You need to think about several things when choosing the right waterproofing material:
- Climate: UV-resistant materials for hot areas, flexible options for cold regions
- Budget: Up-front costs and maintenance expenses over time
- Garden Type: Full green roofs vs. container plantings
- Longevity and Warranty: Pick materials with long-term guarantees from manufacturers
- Popular Brands: Dr. Fixit, Sika, BASF, Fosroc
7. How to Check Your Roof’s Water Resistance
Before you start to set up your garden:
- Do a water pooling test: Cover the roof with water for 24 to 48 hours.
- Look at the ceiling below for any wet spots.
- Apply a moisture meter to find exact wet areas.
DIY Tip: Put tape on all drainage spots before testing and check if water stays put.
8. Tips to Inspect and Maintain
Even top-notch waterproofing needs regular upkeep:
- Look it over every 6–12 months
- Make sure drains aren’t blocked
- Fix cracks or damaged membrane parts right away
Long-Term Upkeep:
Plan to reapply or beef up every 5–10 years based on how long materials last.
9. Common Errors to Steer Clear Of:
Skipping Expert Look-Over: Can result in poor choices of materials
Using Materials That Don’t Mix: Might make things less effective or cause chemical issues
Forgetting to Install a Slope: Causes water to sit still
Improper Curing Time: Has a weakening effect on the membrane
Expert Advice:
Always stick to the manufacturer’s instructions word for word.
10. Cost Estimates and Budget Planning
The cost of waterproofing depends on the method you choose, the size of the area, and where it’s located.
- On average: $2–$4/sq. ft. to waterproof with basic cementitious materials
- Liquid Membranes: $5–$10 for each square foot
- EPDM or PVC Sheets: $8–$15/sq.ft.
Don’t forget these hidden costs:
- Money for inspections
- Fixing the surface
- Changing the drainage
- Layers for coverage
11. Real-Life Case Studies
Case 1: Urban Rooftop Garden in London
A homeowner built a rooftop herb garden. They prevented leaks even during snowy winters by choosing EPDM sheets and making sure the drainage worked well.
Case 2: Apartment Complex in New York
Rain caused a cementitious solution to fail. Experts fixed the issue by applying a liquid membrane again under their watch.
12. Environmental Benefits of Proper Waterproofing
- Lowers Urban Heat Island Effect:
- Waterproof membranes often have an insulating effect on buildings.
- Helps plants stay healthy by stopping waterlogging
- Conserves Water
- Smart systems help save water
- Cuts down on waste and materials and makes the roof last longer.
13. Last Bits of Advice from Pros
- Always check with a licensed contractor
- Keep a record of the whole process to look back on
- Pick quality over cost; cheap fixes often don’t work out
- Plan irrigation and waterproofing together
- Mix insulation and waterproofing to get two benefits
14. Most Asked Questions
Q1. Is it okay to waterproof my rooftop by myself?
Sure, but in specific areas and after careful research and planning. For big projects, it’s best to get help from professionals.
Q2. How long does waterproofing last?
5 to 20 years, based on the technique used.
Q3. Can I put tiles over the waterproof membrane?
Yes, just make sure to cover the membrane with a screen or protection board.
Q4. When can I start gardening after waterproofing?
You should wait at least 7–10 days to let it cure.
Conclusion
Good waterproofing lays the groundwork for rooftop gardens that thrive. If you skip this key step, you risk damaging your plants and your house’s structure. You can create a long-lasting, healthy rooftop garden by following expert advice, picking the right materials, and keeping up with maintenance. Keep in mind, all successful rooftop gardens start with a watertight base.
Want to start your own? We’d be excited to hear your questions or stories in the comments or contact us!


